Today I present a review and tutorial on the product Instant
Moud, I bought this product Online from Firestorm Games in Cardiff (though they
seem to be out of stock at the moment)
So, What is it?
Instant Mold is re-usable putty with the texture of a Glue
Stick like you would use in a hot glue gun, It is sold under the non brand name of Oyumaru. It softens with very hot water to
the texture of blue tac (U.S. - fun tack), whilst warm you can press it over
details of miniatures or models or ANYTHING and it will take a negative print
from it, it then takes about a minuet to cool. When cool you can remove it from
the moulded object and fill the resulting negative with a putty of you’re
choice to create a copy, when the putty is cured you can remove the replica and
either cast another or drop the Instant Mold back into hot water and use it
again!
How much does it cost?
I picked mine up for about £10.00 for 6 strips, which are of
course re-usable.
How much detail is copied?
All of it, or at least 99%, it may take a few attempt to get
all of the air bubbled from the negative when placing in your putty
Can I fill a negative with resin?
No, most resins heat up as they cure so it would distort the
mould.
What are the moral implications of Stealing Detail?
Well, this is a biggie, IT IS WRONG, ILLEGAL AND IMMORAL TO
RIP OFF OTHER PEOPLES HARD WORK!
But there are a few reasons to give it a go. I have chosen the following
example to justify my use of the product.
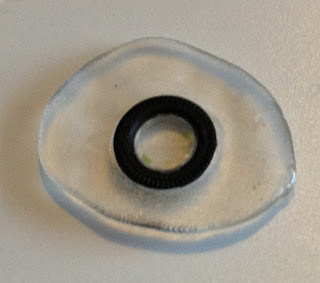
Vinyl Tyres on plastic kits – We all know the horror of
track rot, I can’t help with this but I can offer a solution to vinyl tyres.
1 – Take a tyre and work out which way it will go on the
kit, you want the outside of the tyre UP so it will be pushed into the mould.
2 – Warm up the Instant Mold as per pack instructions and
push over the tyre making sure that it pushes tightly into the middle of the
Tyre
3 – Allow to cool for 1-2 minuets
4 – Remove the negative from the tyre and mix up your putty
of choice (I chose Green stuff)
5 – Fill the negative with your putty, use water to stop the
putty sticking to your fingers as putty will not stick to Instant Mold
6 – let your putty cure for 6 or so hours until set.
7 – Remove your cast from the mould and there you have it, A
tyre that will not rot over time
Bare in mind that this process has taken 6 hours and made 1
tyre, how many tyres are on a typical truck 6? 10? Or more so you may want to
make more than 1 negative mould to hasten the process
What else have I used it for?
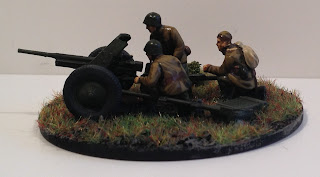
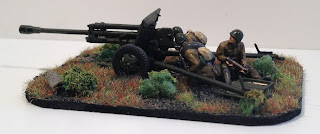
I needed a load of crates for decorating AT and AA gun
bases, so I cast a load of the plastic boxes that come with PSC Zis2/3 AT guns
for this purpose, I do not see a problem with this so long as I do not plan so
sell the cast items or pass them off as my own work,
I have also added cloaks to Zvezda Russians by casting one
from an Elhiem Russian with PpsH. I created the mould in the usual way by
pushing it onto the cloak, but then I filled it with less putty than I needed
and pushed the Zvezda Russian into it while un-cured. I left it to cure fully
before removing the mold, I then had to add the front of the cloak using putty
and regular sculpting to hide the joins.
What do I think?
I do enjoy using this product and highly recommend it, when
I first used it I added new 3D shield designs to my WFB Dark Elves and I have
loved using Instant Mold for all sorts of things since.
There are more uses than I could possibly list here, have a
go but PLEASE…
DO NOT COPY
WHOLE AREAS!
DO NOT SELL CAST PIECES!
AND BE CAREFUL, THE OWNER OF THE ORIGINAL MAY HAVE EVERY
RIGHT TO ASK YOU TO STOP!
BUT MOST OF ALL……….HAPPY MODELING!
Mike


